Tuesday, November 30, 2010

A Day in the Life of Living on my Project Two

The utopian lifestyle that will be created on the site formally known as Aiken village will not be paradise for everyone. However, for those who choose to live here the rewards will be numerous. Inhabitants will be given personal satisfaction to know that their daily lives reduce their carbon foot print on the Earth.

“Early to bed, early to rise” will be the common routine living on this intentional community. The sunshine filtering through high windows will help to awaken students from their slumber.
The morning shower will get its warmth from water heated by the sun. Water that goes down the drain will be piped to a garden, where it can be cleaned, nurture plants and be used again to flush toilets in the house. 

Next, everyone heads to the community kitchen for some breakfast. This meal is not always labor intensive, so most of the time, everyone is on their own for breakfast.  Next, it is off feed the animals. Starting with pets and then moving to the chickens, which will provide fresh eggs and occasional meat. Once everyone is feed it is off to class.

After class, everyone will return to paradise to finish daily chores.  Gardens must be checked for weeds, pests and disease. If rain has been absent for a while, irrigation can provide water to the plants from water stored in rain barrels and cisterns. The constructed wetlands should occasionally be checked for debris or trash that may have made its way into the hydrologic system.

In and around the buildings, private spaces will be offered so that tenets can have some alone time away from the group to relax, to talk on the phone or do some homework. These private spaces will be extremely important for everyone’s mental health and to help to avoid social conflict.

Supper time will be an important time because everyone will chip in to bring the meal to the table by using as much locally produced energy and products as possible. The energy used to light the kitchen and heat the oven will be from solar panels on the roofs. The produce on the plates will have been grown in the gardens on site. Leftovers from previous meals were used to make compost that nurtured the plants for the current meal.

After supper is finished and the kitchen is cleaned, students can congregate in the large social space. There will be room for plenty of room for different activities such throwing a ball, playing music or relaxing by a fire.

Support Drawings for Project Two

These are the support drawings that were done to give some character to the master plan. Included are three perspectives that show how the community should look, two sections that show the spaces created between the buildings and an elevation that offers some insight to the thought behind tree selection and the general architecture of a building.


Finished Project Two Plan

This is my enlarged plan for our second project. I am very happy with the way that I turned out. I feel that I created some nice spaces, both residential and academic. I also included a site plan to put the enlarged plan in context and to show that I tried to incorporate all of the elements that were required for the project.

Still working in Class

Day three of working in class raised the difficulty level. Or maybe I just had a bad day. The previous class we were to refine our concept drawings adding housing layouts and do two sections of our site. On third day we were to further refine our plans by adding details. For some reason I had a lot of problem committing to details. I enjoy this pace because it speeds up the design process and we are able to produce more, but if you have a bad day or you brain refuses to cooperate it really puts you in a corner.

Preliminary Plan 1
Preliminary Plan 2

Working in Class on Project Two

For this second project we were challenged to do our work in class. So rather than a week to come up with two concepts, we had about two hours. That is a pretty substantial difference in time. But, I hate to say that Taze is right when he says that students produce the same amount of work in the shorter time frame when the proper amount of motivation is applied. I enjoyed this process not because I like the pressure but because it was nice to have all of our work complete by lunch and not have to worry about it for a while. I am assuming that this will be very similar to the process used by our future employers, if there are any jobs available. So I guess this whole produce by forced pressure will be good for us in the long run.

Option One

Option Two
These were the first two drawings that were due at the end of the two hour class. I chose two extremely different approaches for the site. The first used the hill as the location for all of the housing and class rooms. I did this so that the flatter land could be used for farming. The second option placed the housing closer to the creek in the flatter area.

Project Two Introduction

Aiken Village as of now
Project two was located on a site that most of us grad students know all too well, Aiken Village.  This was the third time that most of us have done a design for at least a small part of the site.
It seems that the apartments on the site have reached a state of disrepair that the best option is to just start over. So, our challenge was to design a new intentional community on the site. This was to be our own little piece of utopia. Looking back I am not sure that I made it quite to that point, after all there are not proposed snow covered mountains I my design.

Perspectives for Project One

By doing these perspectives, I tried to capture the feeling of the place that I was aiming to create. I wanted to show what it would feel like to walk into the community. I wanted the drawings to be loosely sketched and not feel very mechanical. I added a little color to try and inject a little richness and depth. I think that I worked for most, but feel that some scenes would have worked better with less color or more muted tones.

Trees lining Whitfild Street


Courtyard at eye-level


Stormwater fountain and plaza offer community spaces


Entrance to a mixed use building on the corner of Whitfield and Scales


Example of housing


A walk leading to plaza


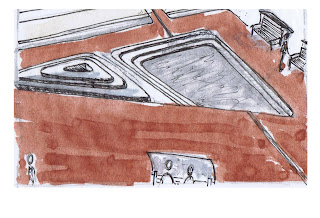
A birds-eye of the stormwater plaza


Housing surrounding community garden and plaza


Homes accessed by street

A mixed use building w/ green roof and a courtyard

Detailed Plan for Project One

I have posted my enlarged plan from project one. It is enlarged to show some of the details to the mixed use plaza. For example, the plan illustrates how stormwater moves through the site. The detailed plan also shows pedestrian movement and the two spaces created for social interaction. The first space is directly behind the mixed use building and is geared for outdoor eating or sitting at a table. The second space is created between the mixed use buildings at the bottom of the plan. This space is intended to be used just sitting on a bench talking, reading or simply enjoying the day.

Master Plan Project One


This is a poster that I made for my presentation. It has my master plan and some support drawings. Around the master plan are pictures and drawings that help to reinforce the feel that and look that I was trying to accomplish for the design.  It shows examples of local architecture, stormwater conveyance, character sketches, and examples of shadows created from entry artwork pieces.  

Design Highlights

I tried to keep the stormwater on site in two ways.  Vegetated swales to slow, collect and direct stormwater for multiple uses. Flow through planters next to house collect rain from gutters after a rain barrel is filled.

There is an increase in density that is typical for the city with a variety of housing sizes and affordability.

Cars are hidden as much as possible by incorporating parking in the rear of the homes.  

Vegetable garden is located in the center of the site with an above ground cistern for irrigation.

There is a central plaza area with a stormwater fountain and a raised fire pit.

The site has three mixed use buildings so that some daily needs maybe made without use of an automobile.

Detail Model of Project One


These are pictures of the detailed model I built, of a large portion of my design. I chose this section to build because if showed a diversity of housing, stormwater fountain and the community gardens.

The base to model was foam board layer up for each contour on the site. I sanded the board to make it smooth and avoid the elevation stair steps. Next, I glued down a copy of my design to give me an outline on the base. For the swales and fountain I burned the foam board out with a soldering knife. The buildings were made of pine glued together and cut to size. Metal roofs were made by gluing layers of aluminum foil together for durability. The green roofs and turf was a fine green powdery material glued down. Trees were a kit that need to be shaped and the foliage glued on. For the vegetated swales and community garden I cleaned out the old spices and herbs from my kitchen. I did not think that the lemon pepper smell would ever go away.


Shade Models for Project One

September

March
June

December


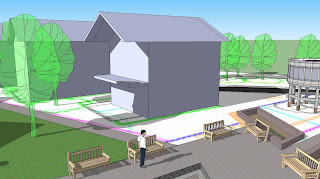
Early on in the design process, I made a Sketch Up model of the site and my proposed buildings. I did this so that I could look at the sunny areas and the shaded areas at various seasons and times of day. I wanted to make sure that during a typically hot time, there would be some needed shade available or during a cool month, there would be warming sunshine. The dates that I observed were March 31st, June 21st, September 30th and December 21st   
These dates should give a good general idea of what the spaces will be like during all times of the year. The times of day that I look at, were noon and at 6 p.m.  

These are examples of one of the houses on the site at different times of the year at six in the evening.


Object of Inspiration for Project One

We were asked to pick an object and bring it to class. This object was to serve as our inspiration throughout our design. What the hell! That was my first thought. My next thought was what the hell am I going to find that is appropriate for class and will be able to inspire me through the design process? Well, I choose a small piece of a cedar board. I thought that it at least smelled good and I like the colors in the grain.
Then I struggled with this piece of wood and thought about starting over about fifty-eleven times. But, then I got the idea to try and mimic the wood grain lines on the board. I dove into this idea and tried to replicate this all over the site. Ultimately, I feel that I was successful incorporating my inspiration into the design. However, I do kind of wish that I had picked something a little different, something a little less obvious as a board for a construction site.

Massing Model for Project One

This was a rather quick model that I put together to look at the masses and voids created by my proposed buildings. I pinned the buildings down and made several different sizes, shapes and stories so that I could move them easily and look at many different options. I made some very crude trees to see approximately what kind of shadows would be there.

Concept for Project One

Since beginning grad school, forming a concept for our design projects has been one of my biggest challenges. I have little problem coming up with ideas for how I feel that the project should turn out. The problem is forming one central idea that ties the whole thing together and gives the project life and meaning.


So for this project, my concept was “to borrow from existing examples around Starkville to convert a vacant, unused lot into a small vibrant community by focusing on using new urbanism principals.” Now that the project is over and I have talked to Taze about it, I see that my concept morphed its self in to more of Goals and Objectives. I believe the concept should read more of a descriptive philosophy that inspires vivid images to the reader. At least that is what I will shoot for the next time I have to come up with a concept statement for a project.

Green Walls

Green walls became an interest for me two summers ago while doing some research on stormwater. The first green wall that I saw and really noticed what I was looking at was at the Renaissance in Ridgeland, Mississippi. A clothing store chain had a modular green wall install on the entrance to the store. At first glance it looked really cool, but as I got closer, I noticed that there were some problems with the plants. This was probably from installing the plants before maturity. Most of the plants appeared sparse and lack vigor.


The next green wall that I got to inspect was in Madrid, Spain. I did not have to get up close to this one to determine the wall of plant’s health. Even from a distance you could tell that this wall was full of healthy life.


 From what I have read about this green wall, it is located on a corner block where there used to be a gas station. The lot is now an open plaza with an entrance to a building with very interesting architecture, interesting in a good way, and the green wall is perpendicular to the street on an apartment building. This was a very interesting place. People were stopping to look at the wall and take pictures, children were splashing in a small fountain and there was a nice botanical garden across the street. It is defiantly worth checking out if you are in Madrid.

Project One

Our first project for studio III focused on infilling an existing site in Starkville. There were several interesting site characteristics. The site only had two small buildings that were abandoned. The houses that surrounded the site were a varied in size, style, value and condition. 
View from northern side of the site


Existing building
Existing building
water tower adjacent to the site

Monday, November 29, 2010

Tiny House


Well this is rather interesting. Before the recession most people would find down-sizing to this scale absolutely ridiculous. I am curious what most people think of this tiny little house these days. Would someone possibly at risk of getting over their head in debt, consider living in something like this? The utilities have to be a lot cheaper.

Drawings

I found this website looking for graphic ideas. I thought that the drawings were very clean, simple and nice. They remind me of the illustrations in Krier’s book. Also a bit like Taze’s examples.

Interactive Windows by Harvard


I found this while researching for a project. These glass panels are fitted with a system that will move, thus changing a pattern or altering the visibility. This could be used as an artistic expression or a way to restrict sunlight. This could be an interesting way to cool a home and save money.

Green Roofs at Mississippi State

This is my thesis research. I built these structures or “cubes” as I like to refer to them, in order to test temperature differences in buildings with and without green roofs. I wanted to keep the buildings small for several reasons: the first is cost, obviously, and then build time, and finally available space and resources.

all six roof systems
The cubes ended up being around three feet tall, by three feet wide on all sides. All six sides of the cube were insulated to regulate temperatures as much as possible. An access door was made to place and monitor the data recording instruments (data loggers).


Green roofs were built by Rob, another grad student, for a separate research project. The depth of the roofs on top of my cubes is around eight inches of growing media. The plants that were chosen were four different varieties of Sedums. Each was picked for its growth hardiness.  


data logger


A data logger was placed inside and on top of each structure, with one being tied to a pole around six feet up to record the air temperature. Data loggers were set to record every thirty seconds. At this interval the battery should have a life span of 11 months before needing to be replaced. This will hopefully be just enough time for me to collect data for almost six months, write my thesis and graduate.


Initial, results from the data loggers show reduced day time and warmer night time temperatures inside the building with green roofs. The maximum temperature difference was six degree Fahrenheit. This could translate to a reduction in energy costs.   


traditional roof for control